For those of you out there who, like me aren't buying clothes for the year, winter can be a tricky time to resist the shops, especially if you're running low on winter woolies, and you're not a fabulous speed knitter!
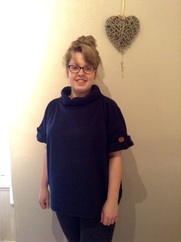
For me I like lots of layers and over sized jumpers at this time of year to keep me extra cosy, so I have designed and made a SUPER easy fleece jumper, that can be worn, by it's self with a pair of leggings or jeans, or over the top of a long sleeved top for extra warmth!!
For me I like lots of layers and over sized jumpers at this time of year to keep me extra cosy, so I have designed and made a SUPER easy fleece jumper, that can be worn, by it's self with a pair of leggings or jeans, or over the top of a long sleeved top for extra warmth!!
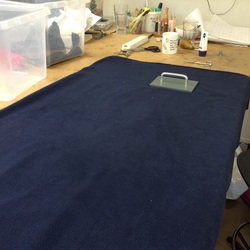
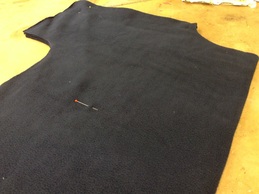
To start with you need some fleece fabric. This is usually available in most fabric stores, however I ordered mine online as it was cheap and arrived quickly. You will need 1.5 meters of fabric. Lay your fabric out and fold it in half selvedge edge to selvedge edge (the selvedge is the factory finished edge of the fabric). The selvedge should be running vertically down the table.
Once you have folded your fabric in half, go to fold it again, like in quarters, however don't fold your fabric right the way over, stop about 30cm from the selvedge edge, as this will leave you some spare fabric to play with at the end.
Once you have folded your fabric in half, go to fold it again, like in quarters, however don't fold your fabric right the way over, stop about 30cm from the selvedge edge, as this will leave you some spare fabric to play with at the end.
You can now draw in your neck line in the top right hand corner. This line should measure quarter of your head measurement. To get this simply ask a friend to measure round the widest point of your head and divide the measurement by 4. You can make you head hole measurement slightly smaller, depending on how much stretch is in your fleece, and how tight you want the head hole round your neck.
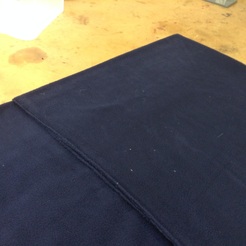
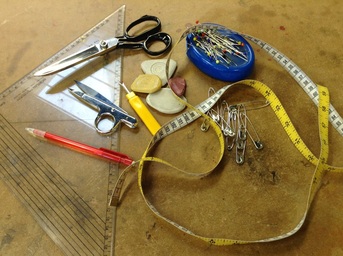
On your selvedge edge, measure down from the top how deep you want your arm hole. I wanted mine quite loose so mine was 20cm deep. From the bottom of your arm hole, draw a perpendicular line outwards, using your set square to make sure you are accurately drawing out at a 90 degree angle. Depending on how long you draw this line, will depend on how long your sleeve is and how baggy your jumper will be. When you have drawn your line to your desired length, curve the line down, and continue drawing a straight line down to the bottom of your fabric.
On your selvedge edge, measure down from the top how deep you want your arm hole. I wanted mine quite loose so mine was 20cm deep. From the bottom of your arm hole, draw a perpendicular line outwards, using your set square to make sure you are accurately drawing out at a 90 degree angle. Depending on how long you draw this line, will depend on how long your sleeve is and how baggy your jumper will be. When you have drawn your line to your desired length, curve the line down, and continue drawing a straight line down to the bottom of your fabric.
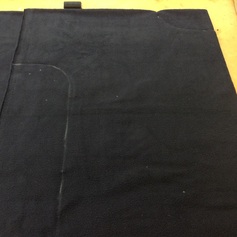
leaving 1.5cm seam allowance, cut out your jumper along the side seam you have just drawn, and do the same round your neck hole.
This next section is easy peasy. All you have to do is sew your side seams up, along that line you have just drawn, and you will have a basic jumper!!
This next section is easy peasy. All you have to do is sew your side seams up, along that line you have just drawn, and you will have a basic jumper!!
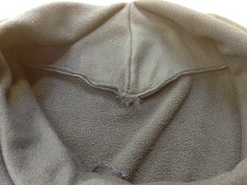
To make the jumper super cosy, I have added on a funnel neck on my jumper. This is easy to make. All you need to do is draw a rectangle the same length as your head hole al the way round, and as deep or as narrow as you wish. I made mine 25cm deep. Leave 1.5cm seam allowance all the way round, and cut out your rectangle. Sew the two shortest edges together so you get your funnel shape, and then fold you funnel in half, concealing your seam on the inside. Pin your neck funnel on the neck line of your jumper, right sides together, with the seam at the centre back point of the jumper. Once you have securely pinned your funnel in place you can then sew the funnel neck onto your jumper.
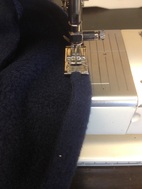
Almost finished! All you need to do now, is hem the bottom of your jumper and your sleeves by, turning back the edge 1.5 cm, and neatly sewing it down. If you match the turned back edge of your hem, with the edge of the foot on your sewing machine it will help make sure you have a neat, straight finish to your hem and your sleeves.
You can stop here if you so wish, as you now have a wearable oversized funnel neck jumper. However for those of you who want to add a bit more detail to your jumper, read on...
For those of you who want a slightly more fitted look to your jumper, put your jumper on inside out, and ask a friend in they will pin darts (a fold in the fabric, taking in any excess fabric, creating more shape to your jumper) in the back of you jumper, to take in the jumper in as much as you require. Make sure your darts are symmetrical before sewing them in place along the pin line.
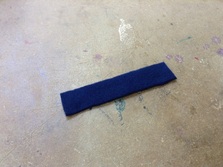
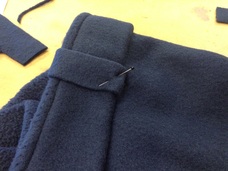
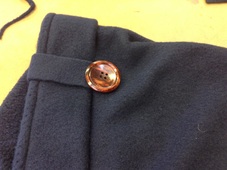
I wanted to add a bit of detail to my sleeves buy creating a turn back cuff. These are easy to create, simply turn the bottom of your sleeve up to your favourite depth and using a couple of tiny hand stitches, secure in place. I then cut a small strip on fleece and hand sewed it to the bottom of the inside of the sleeve, and out over the top of my turn up sleeve. I then anchored this in place on the outside of the sleeve using a few small hand stitches and covered them up with a large, contrasting button to finish. Because fleece doesn't fray, there is no need to hem these strips of fabric, but by all means feel free to finish of the edges if you so wish.
You can stop here if you so wish, as you now have a wearable oversized funnel neck jumper. However for those of you who want to add a bit more detail to your jumper, read on...
For those of you who want a slightly more fitted look to your jumper, put your jumper on inside out, and ask a friend in they will pin darts (a fold in the fabric, taking in any excess fabric, creating more shape to your jumper) in the back of you jumper, to take in the jumper in as much as you require. Make sure your darts are symmetrical before sewing them in place along the pin line.
I wanted to add a bit of detail to my sleeves buy creating a turn back cuff. These are easy to create, simply turn the bottom of your sleeve up to your favourite depth and using a couple of tiny hand stitches, secure in place. I then cut a small strip on fleece and hand sewed it to the bottom of the inside of the sleeve, and out over the top of my turn up sleeve. I then anchored this in place on the outside of the sleeve using a few small hand stitches and covered them up with a large, contrasting button to finish. Because fleece doesn't fray, there is no need to hem these strips of fabric, but by all means feel free to finish of the edges if you so wish.

So that is it. That is how you make a super simple, easy peasy, two seamed funnel neck, fleece jumper. I'd love to see any photo graphs of your jumpers, or any other winter makes for that matter, and I will share them on here for all to see.
(Sound Track, Take Me To Church - Hozier)
(Sound Track, Take Me To Church - Hozier)
 RSS Feed